Quick No Bake Mini Cheesecakes with Toasted Marshmallow
The Starving Chef is supported by Hungry People like you. When you make a purchase through an affiliate link on my site, I may earn a little bit of cash on the side (at no extra cost to you) to help keep my kitchen running. Read our disclosures here.
What’s Up, Hungry People
Cheesecake is probably my favorite dessert—and I love making it in any style. I especially love cheesecake that I can shove into my mouth all in one bite.
Plus, this cheesecake is beyond easy to make because there’s no baking involved.
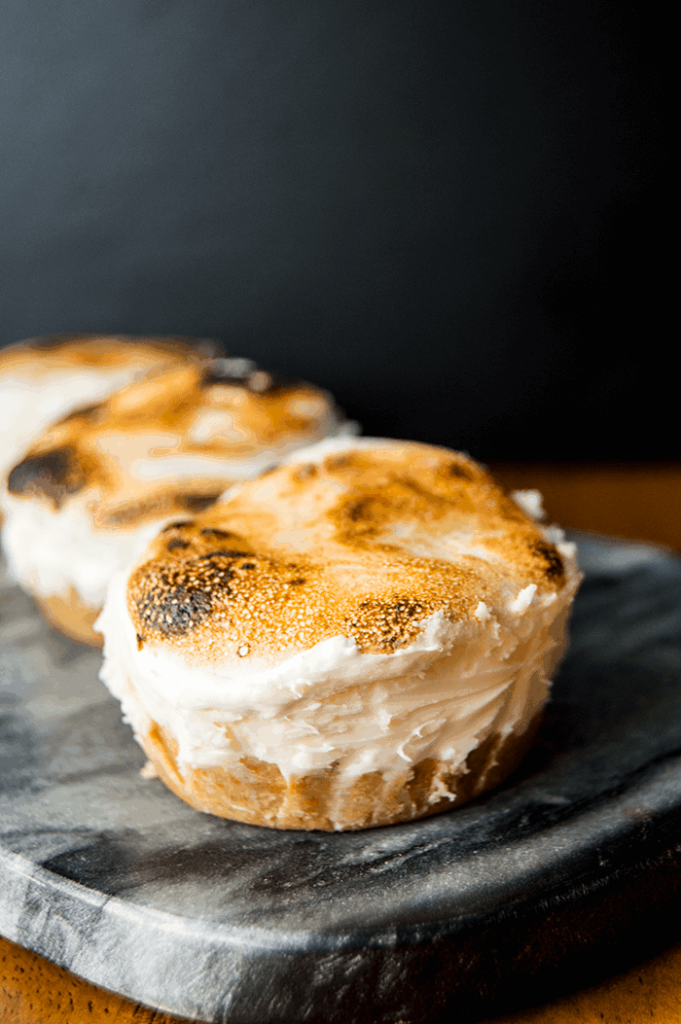
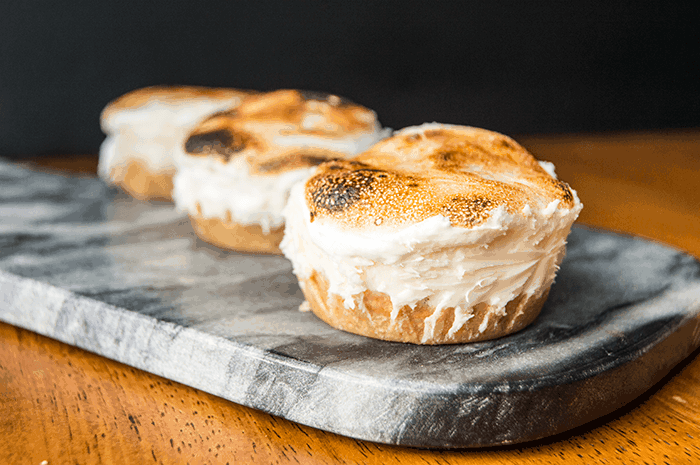
That’s right! No-bake cheesecake makes the perfect base for practically any combination of toppings. This week’s challenge was ‘vanilla,’ so I topped my cheesecake with a vanilla marshmallow topping, then used a brûlée torch to add some golden, toasted brown goodness.
Here’s What You Need
- Cream cheese: Forms the rich, creamy base of the cheesecake.
- Heavy cream: Adds creaminess and helps achieve a smooth texture.
- Powdered sugar: Sweetens the mixture and contributes to the structure.
- Vanilla extract: Provides a warm, classic flavor to the cheesecake base.
- Butter: Helps bind the crust and adds a buttery flavor.
- Graham cracker crumbs: Creates the foundation with a sweet, crunchy texture.
- Salt: Balances the sweetness and enhances overall flavor.
- Marshmallow fluff: Topping that offers a gooey texture and sweet marshmallow taste.
Let’s Cook
Start by getting your muffin tin ready. Line it with cupcake liners and give them a quick spray with cooking oil to make sure nothing sticks. Then, take your melted butter and mix it thoroughly with the graham cracker crumbs until everything looks well combined and crumbly. This is your crust—spoon about 1-2 tablespoons of it into each cup of your muffin tin, pressing it down to form a solid base.
Mixing the Filling
Grab a large bowl and start whisking together the cream cheese, heavy cream, vanilla extract, and a pinch of salt. Whip it up until it’s nice and fluffy. Now, start adding your powdered sugar. Add it gradually, and keep testing the texture. You’re looking for it to thicken up nicely so that it holds its shape well when you lift your whisk out.
Chilling and Topping
Scoop your cheesecake mixture into the crusts you’ve prepared in your muffin tin. Remember to leave just a little space at the top for that yummy marshmallow fluff. Pop them in the fridge and chill for at least an hour to let them set up properly. Once they’re nice and firm, run a knife around the edges to loosen them, then pull them out. Top each one with a good spoonful of marshmallow fluff.
The Finishing Touch
Now for the fun part—take your brûlée torch and carefully toast the marshmallow fluff on each cheesecake. You’re aiming for a nice golden brown color. This not only looks great but adds a wonderful toasted flavor to the topping. Serve them up right away and watch them disappear!
Toasty Tips for Your Cheesecakes
- Preventing Stickiness: To ensure your cheesecakes come out of the tin easily without breaking, make sure you spray the liners with a good amount of cooking oil. This creates a non-stick barrier that helps immensely when removing the chilled cheesecakes.
- Getting the Perfect Toast: When torching the marshmallow fluff, keep the torch moving to avoid burning the marshmallow. Aim for a golden brown finish; it only takes a second for marshmallow to go from perfectly toasted to burnt.
- Cheesecake Consistency Troubles: If your cheesecake mixture isn’t thickening as expected, add a bit more powdered sugar incrementally. This can help achieve the desired consistency without altering the flavor too drastically.
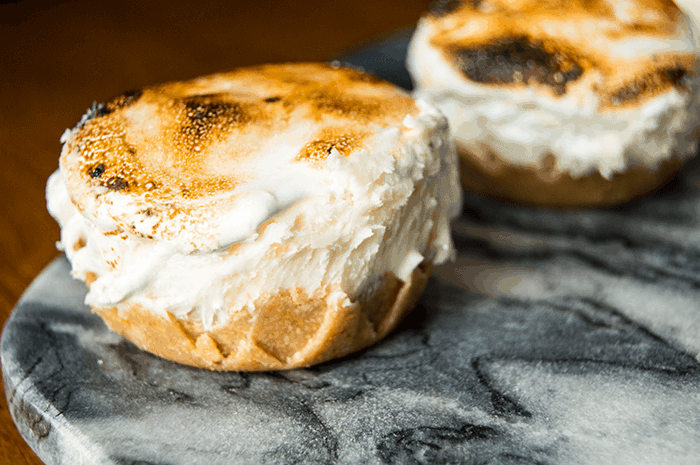
Wrapping up, these mini toasted marshmallow cheesecakes are a breeze to make and a joy to eat. With no oven required, they are a fantastic treat for any season. Whether you’re hosting a summer get-together or want a comforting treat during the winter months, these little delights fit the bill perfectly. They’re just right for when you need a quick dessert that impresses without all the fuss. Grab your muffin tin, some cream cheese, and a brûlée torch, and you’re pretty much set to create a treat that everyone will love. Try them out for your next party or family gathering, and watch as these mini cheesecakes become a new favorite!

Mini Toasted Marshmallow Cheesecakes
Equipment
- cupcake tin
- silicon cupcake liners
Ingredients
- 16 oz cream cheese room temperature
- ¼ cup heavy cream
- 3 tablespoons powdered sugar + more as needed
- 1 teaspoon vanilla
- 3 tablespoons butter melted
- ½ cup graham cracker crumbs
- 1 teaspoon salt
- 1 cup marshmallow fluff for topping
Instructions
- Add cupcake liners to a muffin tin and spray with cooking oil.
- Melt the butter and stir it into the graham cracker crumbs until a crumbly crust forms. Press about 1-2 tablespoons of the graham cracker mixture into the bottom of each divot in the muffin tin.
- In a large bowl, whisk together the cream cheese, heavy cream, vanilla extract, and salt until fluffy. Gradually add the powdered sugar, adjusting with additional tablespoons as needed, until the mixture thickens and holds its shape when the whisk is removed.
- Spoon the cheesecake mixture into the cupcake tins, leaving about a 1/4 inch at the top for adding toppings. Chill for at least one hour to set.
- Use a knife to loosen the edges of the cheesecakes from the tin. Carefully remove the cheesecakes from the tin (optional: remove the papers to expose the sides of the cheesecake). Add a tablespoon of marshmallow fluff to the center of each cheesecake.
- Use a brûlée torch to brown the marshmallow fluff to the desired level of doneness (from golden brown to slightly burnt). Serve immediately and enjoy!