Spooktacular Halloween Cake Pop Monsters: A Fun and Easy Treat!
The Starving Chef is supported by Hungry People like you. When you make a purchase through an affiliate link on my site, I may earn a little bit of cash on the side (at no extra cost to you) to help keep my kitchen running. Read our disclosures here.
What’s up, Hungry People!
Halloween is just around the corner, and while I’m still scrambling to figure out my costume, I’ve got an amazing recipe for you: Halloween Cake Pop Monsters!
Trust me, these spooky treats will make up for any costume indecision.
A Simple and Versatile Recipe
I’ve whipped up these no-bake cake pops in the past, but this time I’ve made sure to properly document the process. The best part? You can customize these pops to your heart’s content by choosing your favorite Oreo flavor and a block of cream cheese for the “cake” center. And the decorating options are endless!
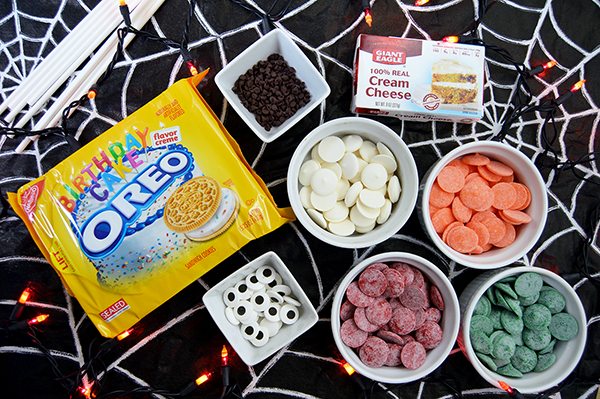
Here’s What You Need
- Oreo cookies: Provide the base for the cake pops, adding flavor and texture.
- Cream cheese: Binds the crushed Oreos together, creating a smooth and sticky dough.
- Candy melts: Used for coating the cake pops, adding color and a hard outer shell.
- Shortening: Mixed with the candy melts to thin them out and achieve a smoother consistency.
- Candy eyes: Used for decorating the cake pops, adding a fun and spooky appearance.
- Chocolate chips: Another option for decoration, providing additional texture and flavor.
Let’s Cook!
First things first, we need to turn those Oreos into fine crumbs. You can use a blender, food processor, or, in my case, good ol’ hands and a kitchen mallet in a plastic baggy. My Magic Bullet wasn’t up for the challenge this time, unfortunately!
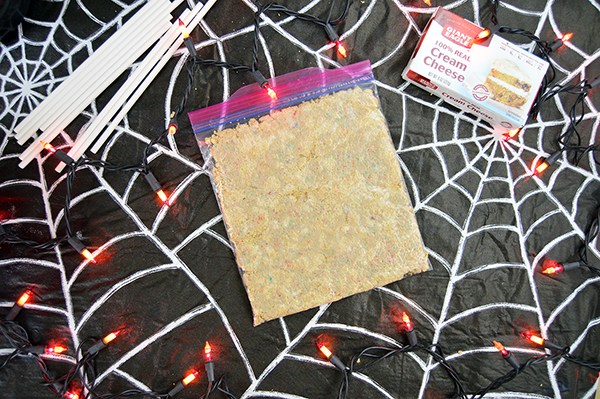
Once you have those crumbs ready, simply stir them together with the cream cheese until a smooth dough ball forms. Pop it in the refrigerator until it’s firm to the touch, which should take about 30 minutes.
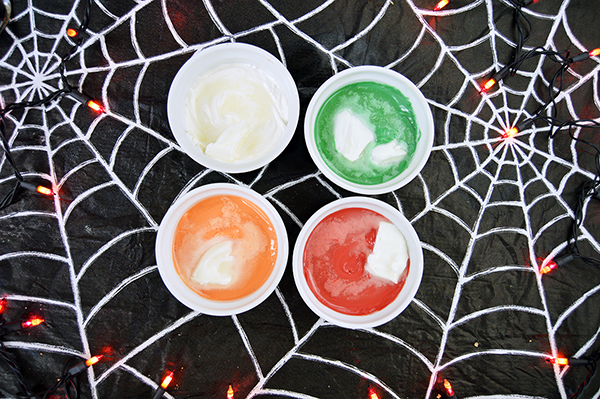
A Handy Tip for Melting Candy Melts
While your dough chills, let’s talk candy melts. Microwave them in 30-second increments to achieve a smooth consistency. And here’s a pro tip for you: Add a tablespoon of Crisco to each bowl of candy. This will prevent it from getting too stiff while you roll the cake pops and give you a smoother finish.
Genius, right?
Assembling the Cake Pops
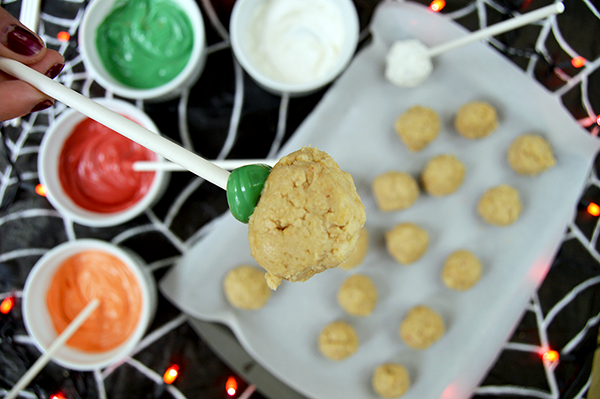
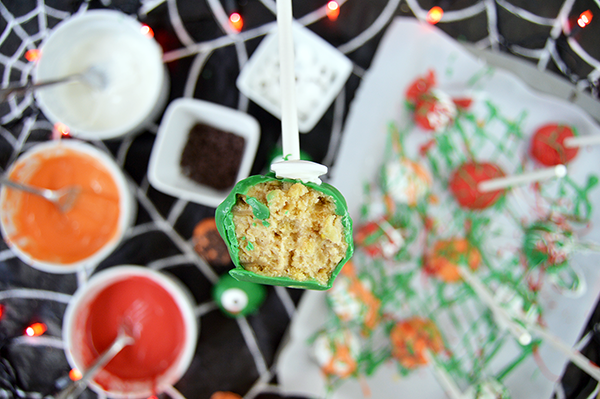
Now, take the cake pop sticks and dip their tips into the melted candy. Insert them into the center of each cake pop. This step helps strengthen the cake pops and ensures they stay intact. Pop them into the freezer for around 10 minutes to allow the candy to harden.
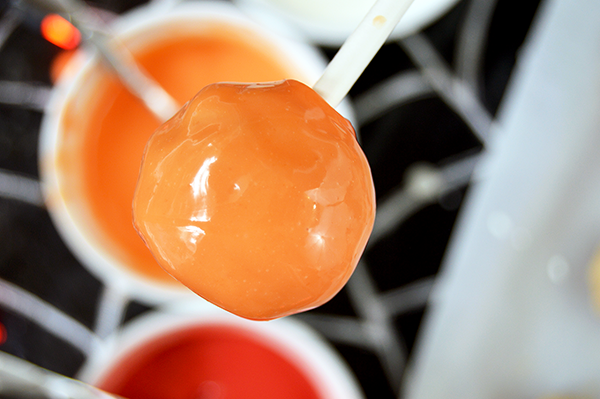
Once the candy has set, it’s time to roll the cake pops! Take each cake ball and roll it alongside the sides of the bowl until it’s completely covered. Arrange the cake pops on a parchment-lined pan and refrigerate them until the candy shell has hardened.
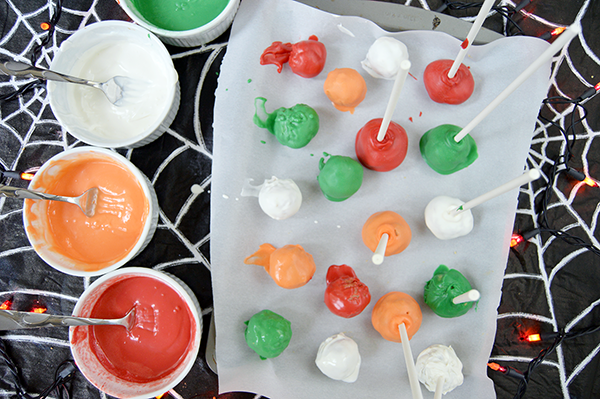
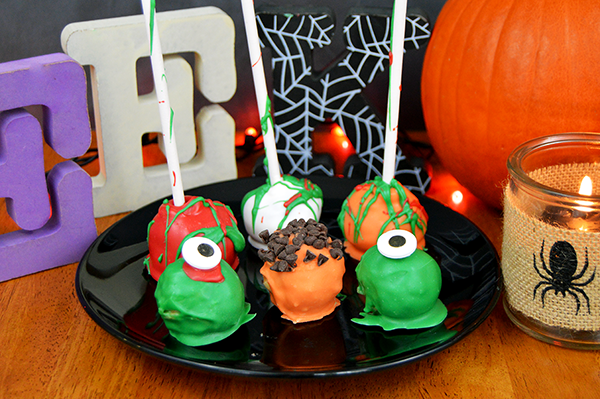
Unleash Your Creativity
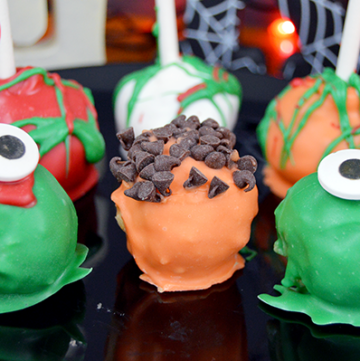
Now comes the fun part—decorating! I initially planned on creating scary little monsters and ghosts, but then I had a wicked idea. Making a mess was a lot scarier (for my poor boyfriend to clean up… muwahahaha)!
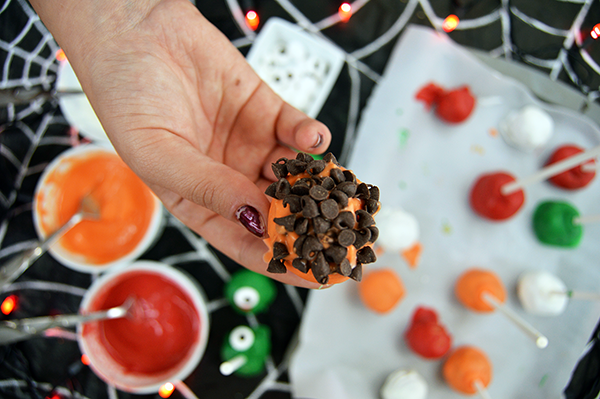
To add toppings like chocolate chips or candy eyes, simply dip the top of the cake pops (or truffles, if you prefer) into the melted candy and press them into the sprinkles, chocolate chips, or even chopped nuts.
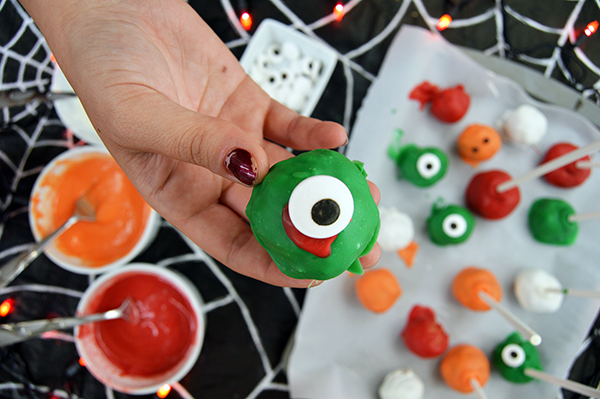
For an extra ghoulish touch, I dabbed a little melted green and red candy onto the backs of the eyes and secured them onto the pops. The drips give them a creepy, bleeding effect!
Tips For Making Halloween Cake Pops
- Crush the Oreos finely: Ensure the Oreos are crushed into fine crumbs to achieve a smooth texture in the cake pops.
- Use room temperature cream cheese: Soft cream cheese blends easily with the crushed Oreos, creating a cohesive dough.
- Refrigerate the dough: Chilling the dough helps it firm up, making it easier to roll into balls.
- Use shortening to thin out candy melts: Adding a tablespoon of shortening per 1/2 cup of candy melts helps achieve a smoother consistency, making it easier to coat the cake pops.
- Freeze the cake pops for added stability: Freezing the cake pops after inserting the sticks helps harden the candy coating and secure the dough balls.
- Roll the cake balls in individual candy colors: Rolling the cake balls in different colored candy melts adds visual appeal and a playful touch.
- Refrigerate the decorated cake pops: After decorating, refrigerate the cake pops to allow the candy coating to set and ensure they stay intact.
- Get creative with decorations: Use candy eyes, chocolate chips, or other toppings to personalize and bring your cake pops to life.
- Store refrigerated for up to one week: Keep the cake pops refrigerated to maintain freshness and enjoy them over several days.
- Have fun and embrace imperfections: Remember that cake pops are meant to be fun and whimsical, so don’t worry if they’re not perfect—embrace the uniqueness of each one!
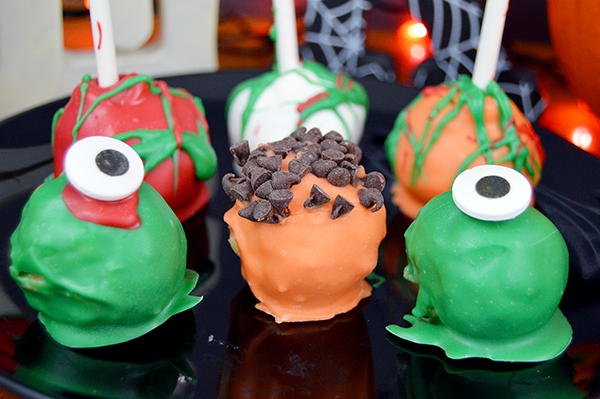
The Spooktacular Result
Once you’re done decorating, your Halloween Cake Pop Monsters are ready to be devoured! Sink your teeth into a pop that has the sticky consistency of a cake pop but with double the awesome flavor!
Halloween Cake Pop Monsters
Ingredients
- 1 package Oreo cookies your favorite flavor variety
- 8 oz cream cheese room temperature
- 4 cups candy melts assorted colors for seasonal decorating
- 1 tablespoon shortening per 1/2 cup candy melts
- candy eyes
- chocolate chips
Instructions
- Crush the Oreo cookies with a blender or food processor. If you don't have either, fill a plastic baggie with Oreos and crush them with your hands or a kitchen mallet until they become fine crumbs.
- In a mixing bowl, use a hand mixer to combine the room temperature cream cheese with the Oreo crumbs. Blend until a smooth and sticky "dough" forms. Shape the dough into a ball and refrigerate it for 30 minutes or until it becomes firm.
- Once the dough is firm, roll it into 1-inch round balls and place them on a cookie sheet lined with parchment paper. If the dough becomes too sticky to work with, refrigerate it for an additional 10 minutes to firm up again. After shaping all the dough into balls, refrigerate them for 15 minutes.
- In separate bowls, melt about 1/2 cup of candy melts in each color of your choice. Add 1 tablespoon of shortening to each 1/2 cup of candy melts to thin them out. Stir until the melts have a smooth consistency.
- Dip the end of a cake pop stick into each color of melted candy and insert it into the center of each dough ball. Refrigerate the cake pops for 5 minutes to allow the candy to harden and secure the dough balls.
- Take each dough ball on a stick and roll it in individual candy colors until it is completely coated. Place the coated cake pops back on the parchment-lined cookie sheet and refrigerate them for 5 minutes or until the candy coating has hardened.
- Decorate the cake balls according to the holiday you are celebrating. Add candy eyes, chocolate chips, or any other toppings you desire. Let your creativity shine!
- Refrigerate the decorated cake pops for up to 1 week, and when you're ready, enjoy!