Make Your Own Turkey Bone Broth with Holiday Leftovers
The Starving Chef is supported by Hungry People like you. When you make a purchase through an affiliate link on my site, I may earn a little bit of cash on the side (at no extra cost to you) to help keep my kitchen running. Read our disclosures here.
What’s Up, Hungry People
I’m finally catching up on all the food that I made over Thanksgiving. It’s hard to blog and cook for a crowd simultaneously! Fortunately for me (and for you), my family decided to celebrate Thanksgiving on Friday afternoon this year, so I had the opportunity to make most of my big Thanksgiving dinner the night before and just reheated it when it was time to serve. It worked out perfectly.
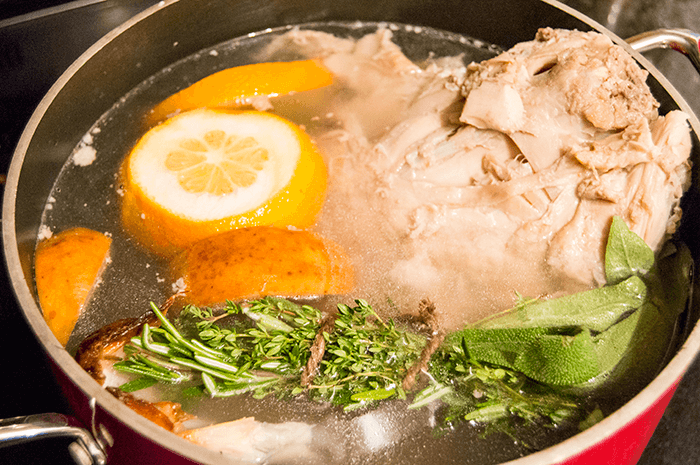
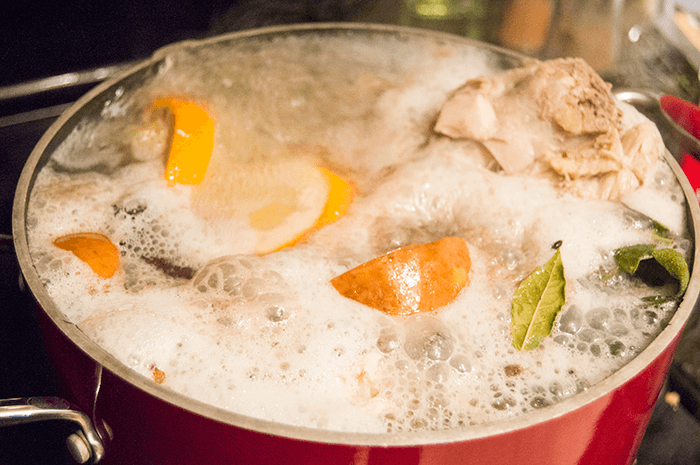
I turned my leftover turkey carcass into a pot of gold – literally and figuratively. You see, after a grand Thanksgiving, my pot was filled with the carcass of a robust thirteen-pound turkey. And, if you’re anything like me, you went the extra mile with your turkey – mine was brined and stuffed with a delicious combo of apples and oranges. If you did too, kudos! Those additional bursts of flavor from the stuffing will pay off in your broth.
Don’t sweat it if your bird was on the simpler side – a good bone broth is forgiving and can mingle with whatever flavors you throw in. My little extra? A bundle of fresh herbs I had lying around because why not?
Here’s What You Need:
- Turkey or Chicken Carcass: Basis for the broth; adds richness and depth.
- Water: The solvent for the broth; extracts flavor and nutrients from the bones.
- Thyme: Herb with a subtle, earthy flavor; pairs well with poultry.
- Rosemary: Aromatic herb; adds a piney flavor and aroma.
- Sage: Provides a musky, earthy flavor; classic poultry seasoning.
- Bay Leaves: Infuse the broth with floral and herbal notes.
- Sea Salt: Enhances flavor, helps extract proteins from the bones for a richer broth.
The Simmering Magic:
I brought my broth to a cheerful boil before playing the waiting game – simmering is where the magic happens. With a pot covered, the simmer turned my kitchen into a savory-scented haven, with only the occasional intervention to ensure those bones were doing their part.
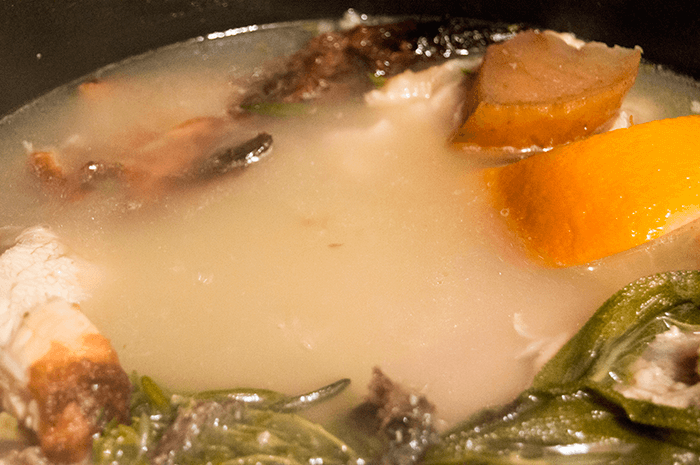
Give it time – a proper broth takes patience. After about two hours, you’re looking for that warm, cloudy amber that screams “I’m ready!” I called it quits after two and a half hours because, let’s be honest, my bed was calling. But if you’re a night owl, feel free to extend the spa day for your broth.
The Grand Finale:
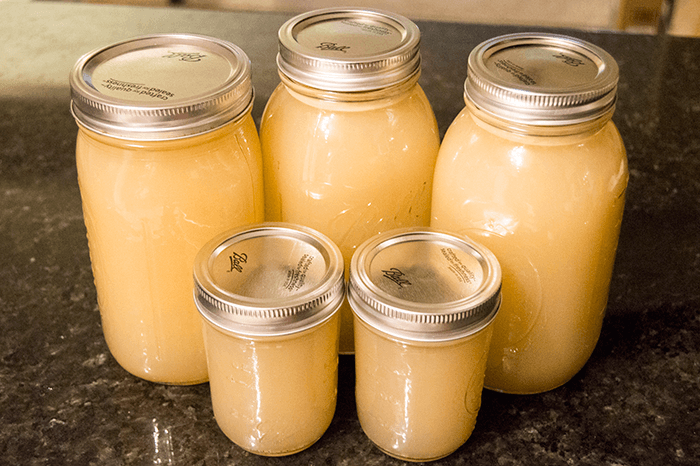
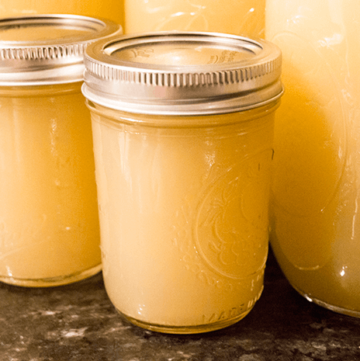
When the time comes, grab those tongs and pluck out the bones and herbs. You’ve got two choices now: savor the soup in its rustic glory or, for the purists, strain it for a clear, golden liquid to grace everything from soups to sauces.
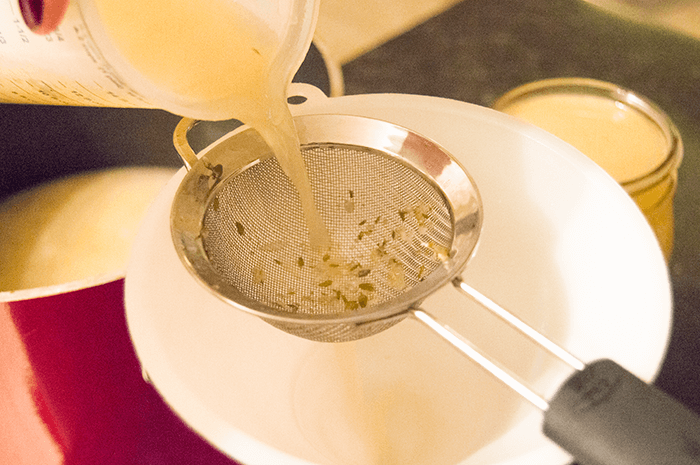
I opted for door number two, straining my culinary creation into jars for later use. And let me tell you, I had plans. Like that turkey noodle soup on the horizon (keep your eyes peeled for that recipe).
Using a Canner for Proper Storage of Brone Broth
- Prepare Your Canner: Fill your canner with enough water to cover your jars by at least 1 inch. Preheat the water to a simmer (around 180°F) for hot-packed foods and to a boil (212°F) for raw-packed foods.
- Prepare Your Jars: Wash jars, lids, and bands in hot, soapy water and rinse well. Keep jars warm until they are ready to be filled to prevent them from breaking when placed into hot water.
- Fill Your Jars: Pack the prepared food into jars following a recipe or safe canning guidelines. Leave the appropriate headspace as directed by your canning recipe.
- Release Air Bubbles: Slide a non-metallic spatula inside the jar to release any trapped air bubbles. Adjust the headspace if necessary after removing air bubbles.
- Wipe Jar Rims: With a clean, damp cloth, wipe the rim and threads of the jar to remove any food residue that might prevent a proper seal.
- Place Lids and Screw Bands: Center the lid on the jar, allowing the sealing compound to come in contact with the jar rim. Apply the screw band and adjust until fingertip tight to allow air to escape during processing.
- Process the Jars: Place the jars on the rack in the canner, ensuring they are covered by at least 1 inch of water. Cover the canner, and bring the water to a steady boil. Process the jars for the time specified in your recipe, adjusting for altitude if necessary.
- Cool the Jars: Turn off the heat, remove the canner lid, and let jars cool in the canner for 5 minutes to prevent sudden temperature changes. Then, remove the jars, placing them on a towel or rack without tilting them, and allow cooling for 12-24 hours without moving them.
- Check Seals: After jars have cooled, check the seals by pressing the middle of the lid. If the lid does not flex up and down, the jar is sealed.
- Store Properly: Label your sealed jars with the contents and date. Store them in a cool, dark place. Unsealed jars should be refrigerated and used first.
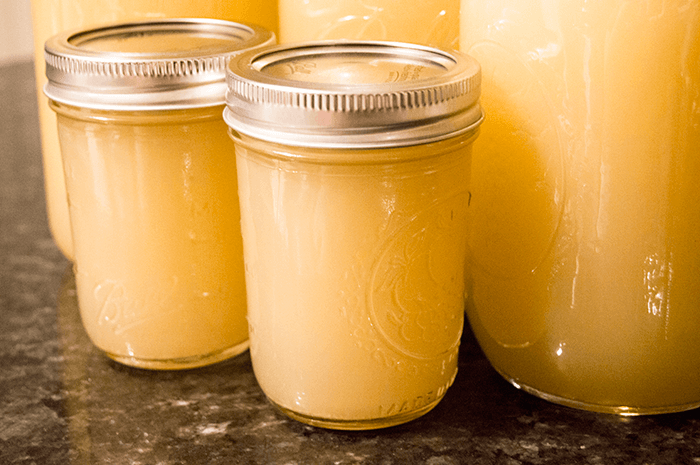
Wrapping up my turkey bone broth adventure, I’m already plotting ways to use this golden elixir. With jars of it tucked away, I’m feeling pretty pleased with this sustainable, waste-not-want-not approach to Thanksgiving leftovers.
Remember, whether you’re sipping it solo or throwing it into your next culinary creation, this broth is a testament to the power of patience and the magic hidden in a pile of bones. Sure, it’s a humble bowl of broth, but the possibilities it holds are anything but. Let’s not forget the therapeutic simmering that fills the kitchen with herby, homey aromas—definitely a bonus!
Keep those jars handy, Hungry People, because those future recipes using our homemade broth will be worth the wait. Enjoy!
The Ultimate Guide to Homemade Turkey Bone Broth
Equipment
- strainer
Ingredients
- 5-8 lbs cooked full turkey or chicken carcass, strips of meat, bones, etc
- 10 cups water enough to cover the bones completely
- 3 springs thyme bundled
- 3 sprigs rosemary bundled
- 3 sage leaves bundled
- 2 bay leaves
- 1 cup sea salt optional, leave out for sodium-free broth
Instructions
- Place the turkey carcass in a pot large enough to ensure it can be completely submerged in water. Add enough water to cover the bones completely, then add the bundled thyme, rosemary, sage, and bay leaves.
- Bring the water to a rolling boil, then cover and reduce the heat to maintain a medium-high simmer. Let the bone broth simmer for 2-4 hours, or until the broth attains a cloudy golden color. Taste the broth; then season with salt according to your preference, adding gradually and stirring until it dissolves completely.
- Use large tongs to remove and discard the turkey bones, excess meat, and herb bundles. At this point, you can choose to serve the broth as it is, or for a clearer broth, strain it to remove any remaining bits of herbs or meat.
- The bone broth can be enjoyed as a soup or used as a stock in other recipes. If canning, store in the refrigerator for up to one year or freeze for extended storage. Use refrigerated broth within one week.